
This guide describes how to set up BlinkStick ambilight with Kodi/XBMC on Linux OS. You will need some time  and your favourite beverage
  so make sure you have both before you begin.
Prerequisites
This guide has been tested with Kodi 14.2-BETA1 on Kodibuntu, but should work with any version of Kodi/XBMC. To get started, you will need:
- BlinkStick Pro with IKEA DIODER ambilight mod
- Linux OS with Kodi/XBMC installed or Kodibuntu available in the downloads section of kodi.tv. You will have to follow the instructions on Kodi.tv website to set up Kodi on your PC
- PC, nettop, NUC or laptop computer to run this on and connect BlinkStick
Before you begin
It’s a bit more convenient to log into Lubuntu provided with Kodibuntu to access the the web browser and command line terminal. To do this, log out of Kodi

And click on the Exit menu item.
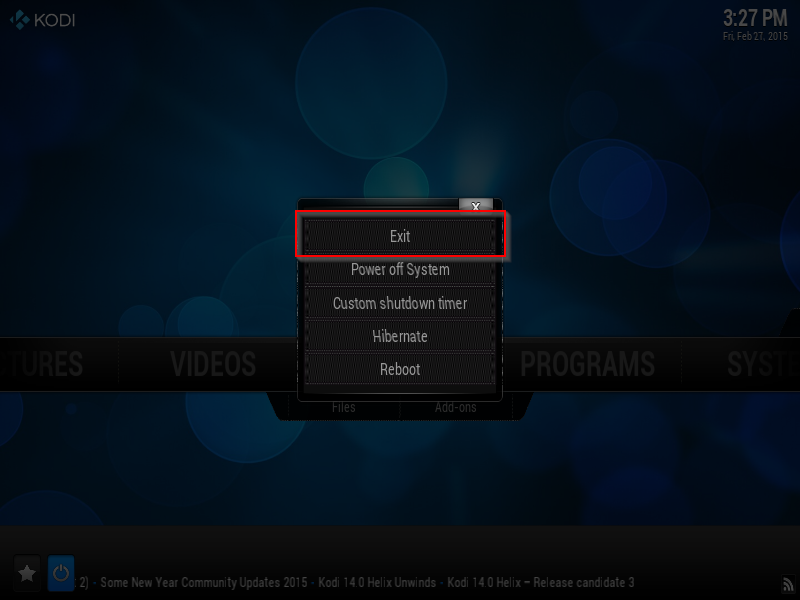
This will take you to login screen where you can choose Lubuntu desktop to log in to. Enter your username and password to continue.
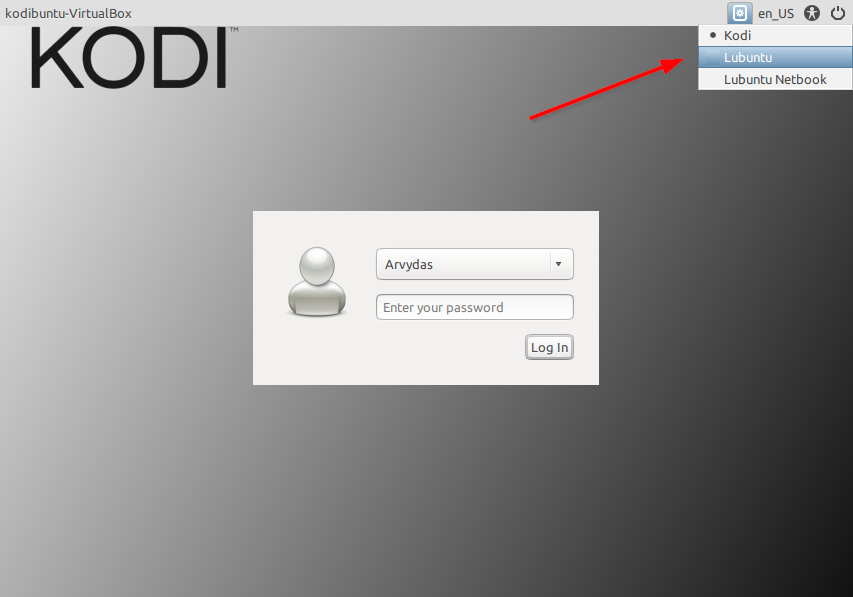
Now you can use the main menu to access:
- Browser via Internet
 Chromium Web Browser
- Terminal via System Tools XTerm
- Kodi via Sound & Video Kodi Media Center
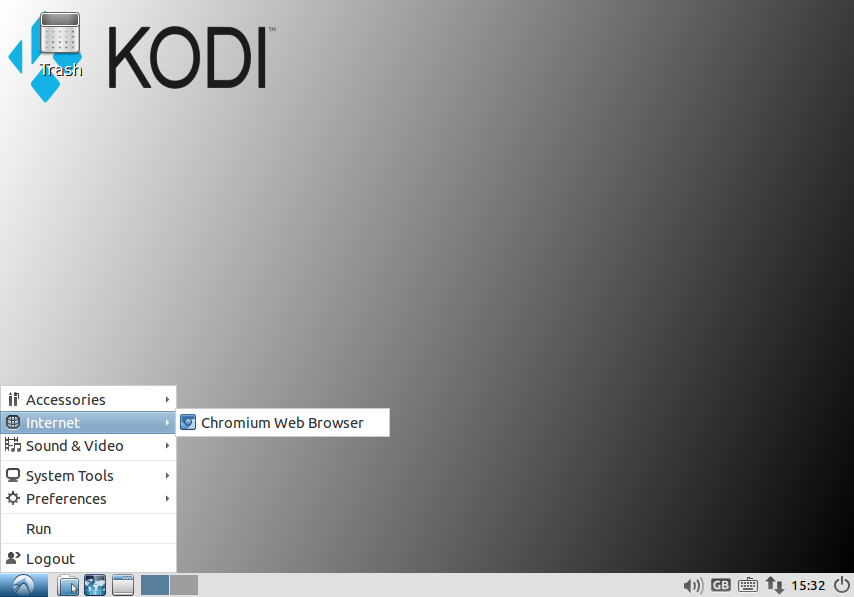
Start XTerm terminal for your next steps.

Build binary files
Prepare the build environment and install build tools.
sudo apt-get install -y build-essential autoconf libtool libusb-1.0-0-dev portaudio19-dev git
Clone the repository to get the latest source code for boblight patched to support BlinkStick devices.
git clone http://github.com/arvydas/boblight
Change directory to the cloned source code folder.
cd boblight
Run the following commands to set up build variables and build boblightd together with required libraries for Kodi/XBMC.
./autogen.sh
./configure --without-x11 --prefix=/usr
make
sudo make install
After this step you should have boblightd installed under /usr/bin/boblightd
Configure your system
The configuration file for BlinkStick Pro is already added to the repository. Run this command to copy it to /etc
sudo cp ./conf/blinkstick.conf /etc/boblight.conf
More details about configuration file format is described in the Boblight wiki, but at this point you shouldn’t worry about it.
The standard Linux OS distribution allows only root users to access certain USB devices BlinkStick including. In order to avoid permission problems when you run boblightd, please run the following command to add udev rule which allows any user to have access to any BlinkStick device connected to the OS:
echo "SUBSYSTEM==\"usb\", ATTR{idVendor}==\"20a0\", ATTR{idProduct}==\"41e5\", MODE:=\"0666\"" | sudo tee /etc/udev/rules.d/85-blinkstick.rules
Automatically start boblightd when OS starts
The following section describes how to make sure that boblightd is automatically started with OS. First, you have to add boblightd user. This is the user name to which the process will be assigned to when service starts. The user created will not have shell access and user directory in /home as it’s not necessary.
sudo useradd -r -s /bin/false boblightd
Create init.d configuration file for boblight by opening nano editor.
sudo nano /etc/init.d/boblight
Paste the following content:
#!/bin/sh

# INIT INFO
# Provides:          boblightd
# Default-Start:     2 3 4 5
# Default-Stop:      0 1 6
# Short-Description: boblightd daemon
# Description:       Boblight daemon
### END INIT INFO

PATH=/usr/local/bin:/bin:/usr/bin
NAME=boblightd
DAEMON=/usr/bin/$NAME
PIDFILE=/var/run/$NAME.pid
DESC="boblight daemon"
USER=boblightd

[ -x "$DAEMON" ] || exit 0

. /lib/lsb/init-functions

case "$1" in
  start)
    # master switch
      log_daemon_msg "Starting $DESC" "$NAME"
      /sbin/start-stop-daemon --start --exec $DAEMON --background --make-pidfile --pidfile $PIDFILE --chuid $USER
      log_end_msg $?
    ;;
  stop)
 # master switch
      log_daemon_msg "Stopping $DESC" "$NAME"
      /sbin/start-stop-daemon --stop --pidfile $PIDFILE --chuid $USER
      /bin/rm -f $PIDFILE
      log_end_msg $?
    ;;
  reload|restart)
    $0 stop && $0 start
    ;;
  status)
 status_of_proc -p $PIDFILE $DAEMON $NAME && exit 0 || exit $?
    ;;
  *)
    echo "Usage: /etc/init.d/$NAME {start|stop|restart|status}" >&2
    exit 1
    ;;
esac

exit 0
Press Ctrl+O to write file, then press Enter to accept the file name and finally press Ctrl+X to exit Nano editor.
Change it to executable mode:
sudo chmod 755 /etc/init.d/boblight
Add it to autostart:
sudo update-rc.d boblight defaults
Now you can start, stop and restart boblight by issuing the following commands:
sudo service boblight start
sudo service boblight stop
sudo service boblight restart
Test the service start/stop. Here is how it should look like:
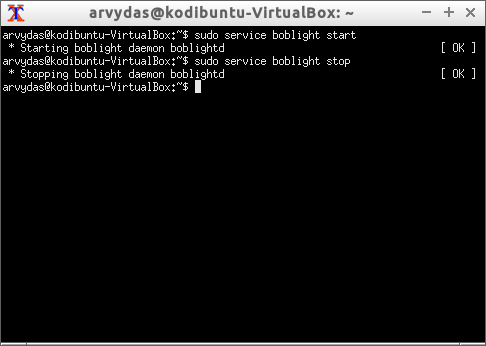
Leave the service running before you go to the next stage with
sudo service boblight start
Now your OS has boblightd installed as a service and running on your machine. This service listens for commands to set LED color. Time to configure Kodi to use this service and light up BlinkStick!
Configure Kodi
In this section you will learn how to set up Kodi with Boblight plugin.
You should still be in Lubuntu desktop. Go ahead and start Kodi via main menu Sound & Video ![]() Kodi Media Center.
Kodi Media Center.
Go to System ![]() Add-ons
Add-ons ![]() Get Add-ons
Get Add-ons ![]() Kodi Add-on repository
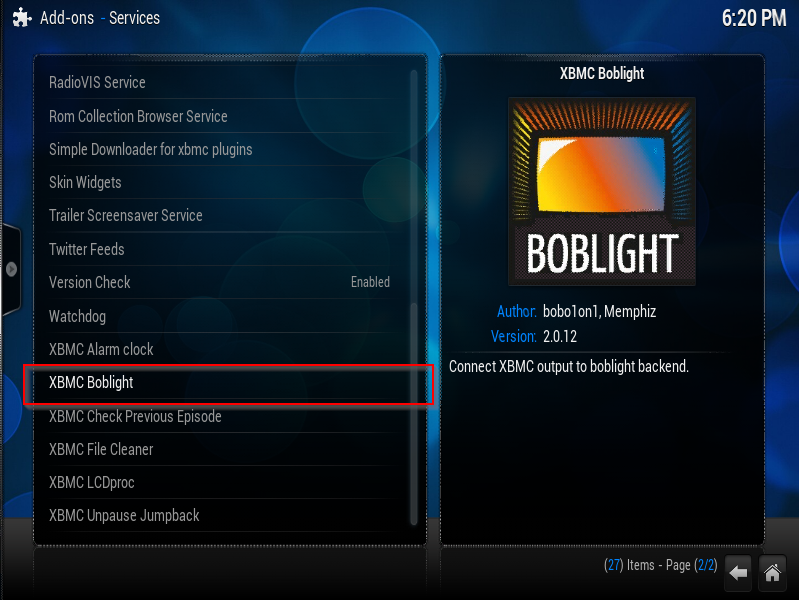
Kodi Add-on repository ![]() Services
Services ![]() XBMC Boblight
XBMC Boblight
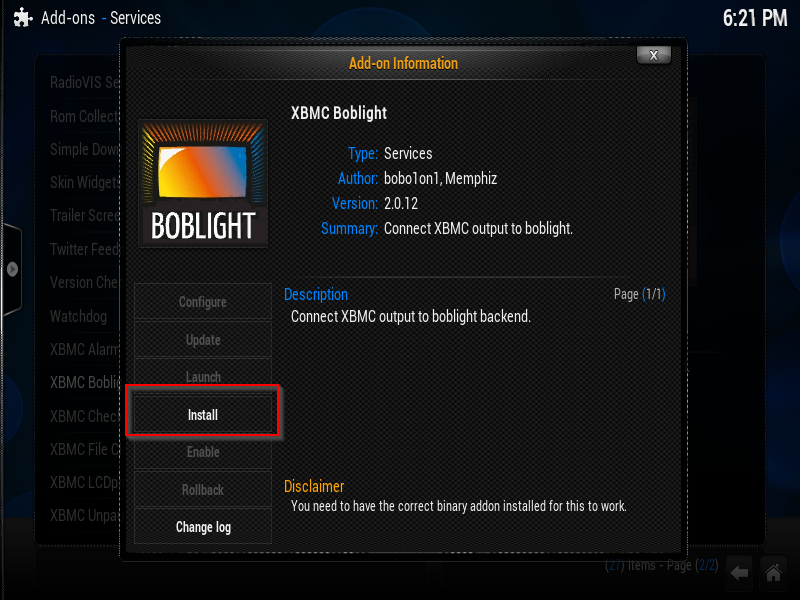
Press Enter to open up Add-on information screen and click on Install button:
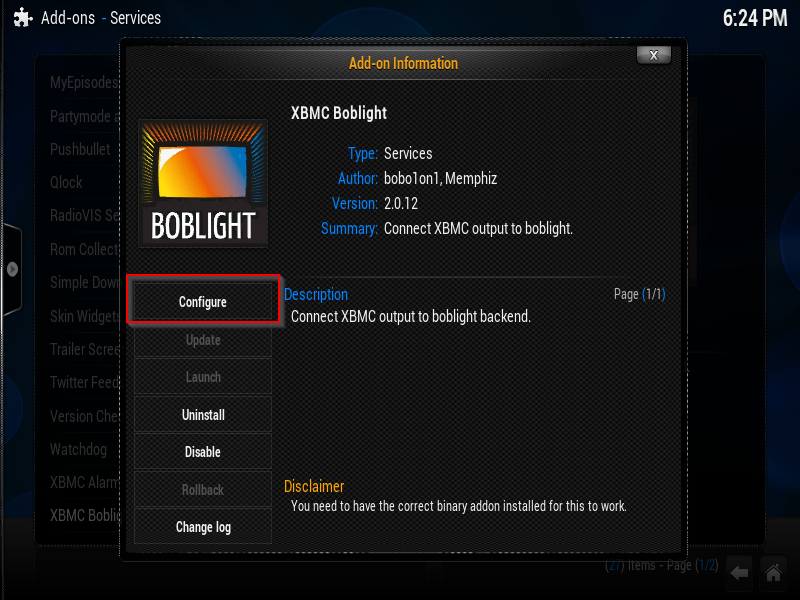
That’s it! Kodi should now send color of the screen to Boblight service. If you want to change the parameters you click on the same XBMC Boblight again and click on Configure:
Try and play a video with Kodi to see the ambilight effect on BlinkStick.
Final setup
You should still be in Lubuntu desktop with Kodi running. At this stage you can make sure that Kodi always starts when you reboot your media center. In order to do that, exit Kodi as described in Before you begin section. Then log out Lubuntu desktop environment with main menu Logout. You will be brought back to login screen. This time select Kodi as your desktop environment and log back in with your username and password.
When Kodi starts, BlinkStick will fade to red-green-blue indicating that everything is set up and running with Boblight service. One final step is to reboot the computer by exiting Kodi and using menu item Reboot. When PC reboots, you should see the startup LED sequence on BlinkStick red-green-blue.
If you encounter any issues with this guide, please reply to this topic and I will be happy to help!

