
With a recent inclusion of Maker channel it has become possible to control BlinkStick with IFTTT. This guide explains how you can do it.
Create a device on BlinkStick.com
First you need to add a device on BlinkStick.com and connect your BlinkStick to the service. You can sign up or log in to the service and if you have an account in these forums, you can use your username and password to log in. Add new device to your account and name it as IFTTT (name is only for your reference). Make sure that you check Public checkbox! You should see a page similar to this once your device is created:
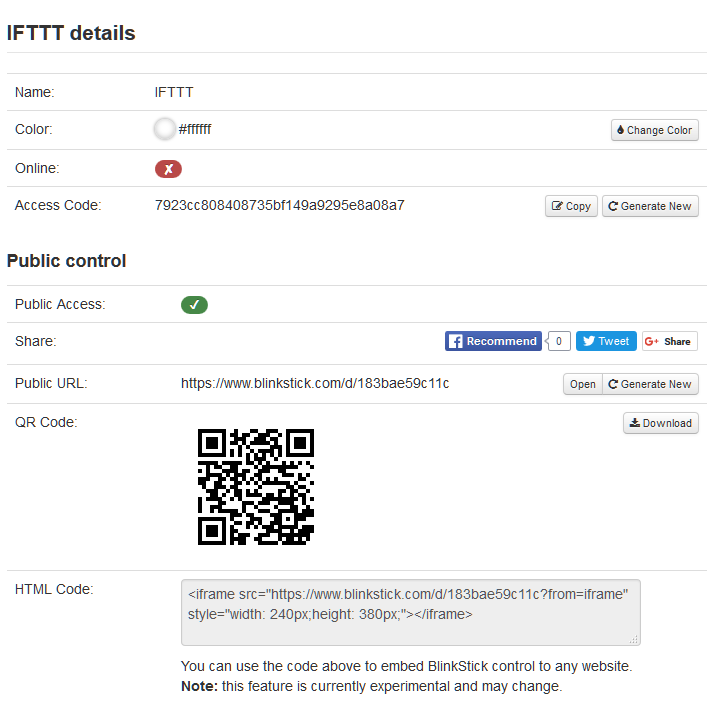
The two settings your are interested in are Access Code and Public URL:
- Access Code - used to connect client application to the service and receive color notifications
- Public URL - used to control BlinkStick remotely from the Internet
Configure BlinkStick Client application (Windows only)
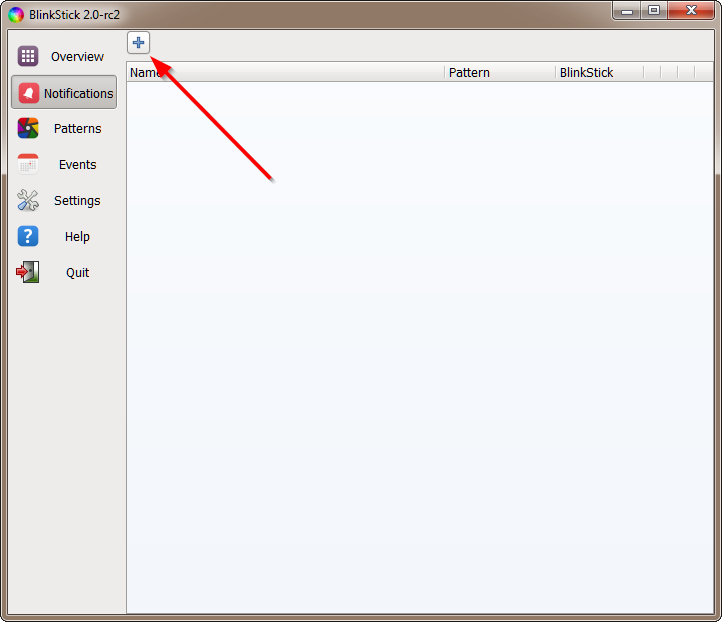
Grab the latest copy of BlinkStick Client application. When installation competes and application is started, select the Notifications tab and click on the plus button to add new notification:
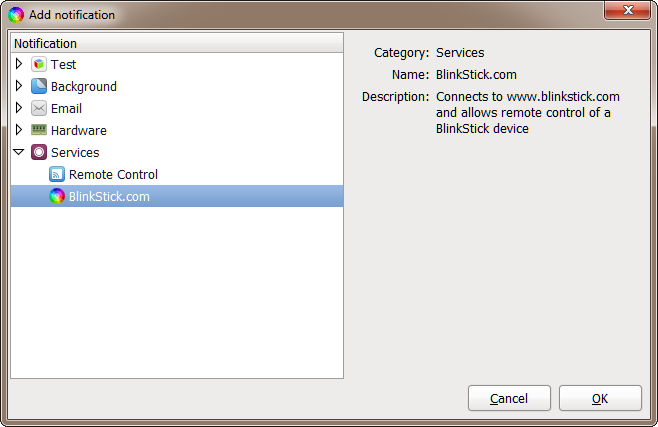
From the Services group select BlinkStick.com and click Ok.
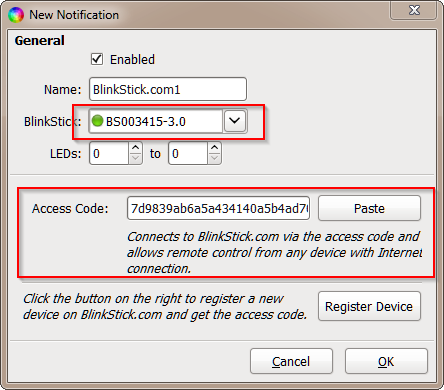
On the notification configuration page select your BlinkStick and paste the Access Code in the the box. Click Ok to save the notification.
Your BlinkStick should now be visible as connected on the dashboard.
Connecting to BlinkStick.com with Python (Windows, Linux and Mac)
Note: You do not need this step if you have already connected your BlinkStick with the Client application.
You can also download and install BlinkStick Python module and use this example to connect to BlinkStick.com service with Python. Remember to replace the text for access_code variable with the access code of your device!
Test connection
A quick way to test whether BlinkStick can be controlled remotely is by using your device’s public URL with color parameter in your browser:
http://www.blinkstick.com/d/12345678/red.json
http://www.blinkstick.com/d/12345678/green.json
http://www.blinkstick.com/d/12345678/aa10ff.json
More information on how to specify color can be found on the website API description page.
Integrate with IFTTT
Activate Maker channel on your IFTTT account. Once you’ve done that, you can create a new recipe.
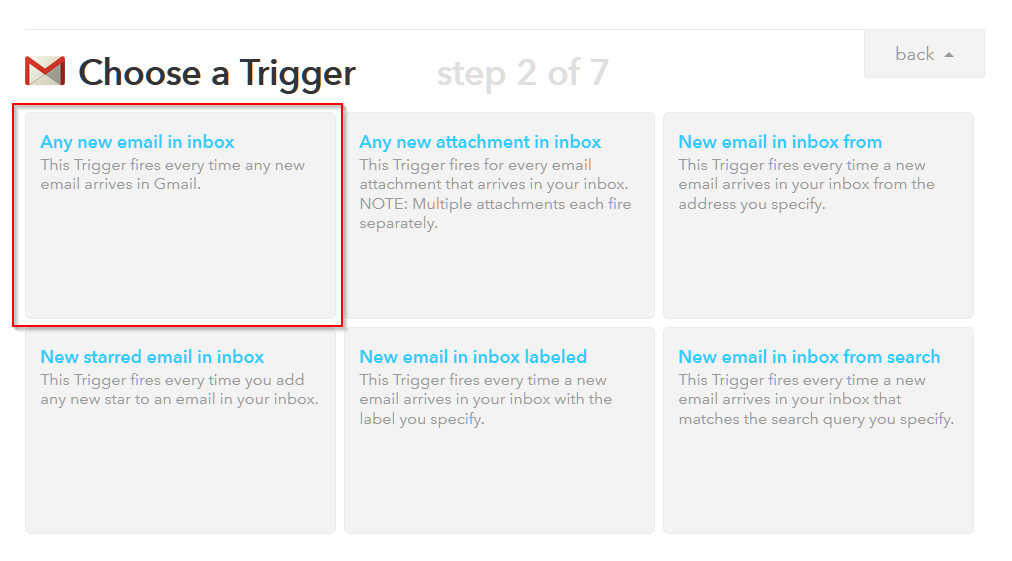
Click on this link and select one of may IFTTT triggers. For this example I selected GMail and selected “Any new email in inbox”.
Once you’ve finished setting up your Gmail, click on that link.
Select Maker channel and configure it as displayed in the screenshot below:
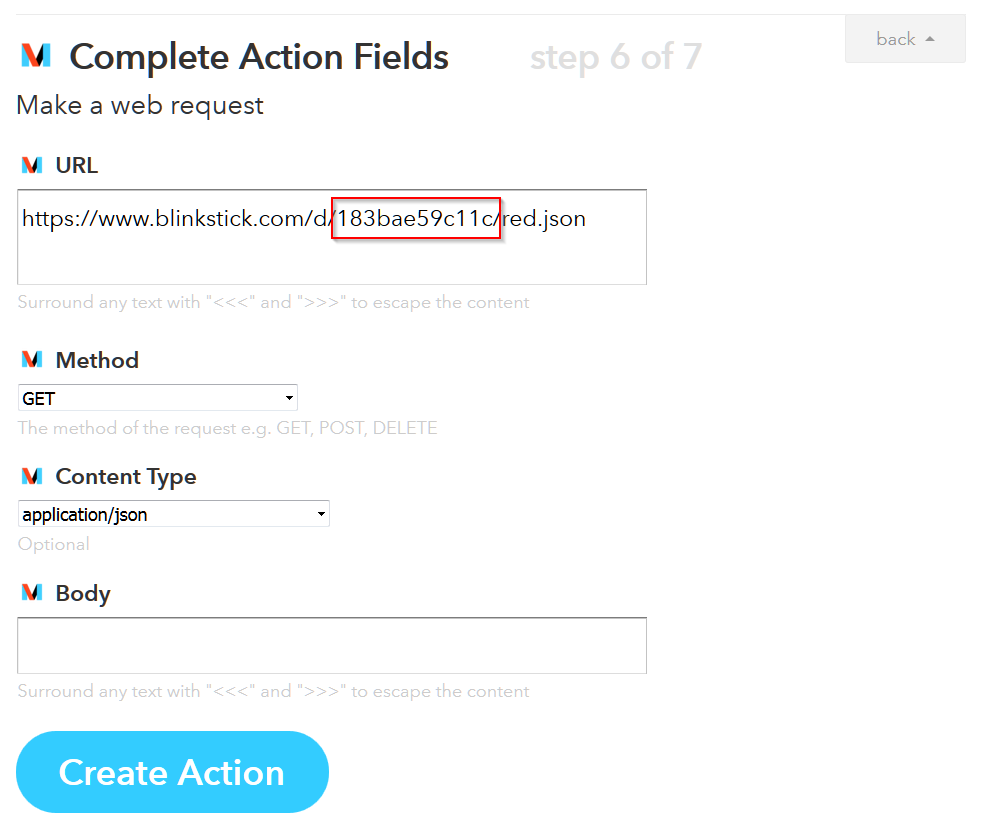
Make sure you specify public URL for your device and any color you want. Finish creating the action and recipe.
That’s it! Now every time you receive new email to your GMail account you will get a notification to your BlinkStick.
What’s going on behind the scenes?
When IFTTT detects that there is new mail in your GMail account, it will send an HTTP request to BlinkStick.com. BlinkStick.com will immediately notify your connected BlinkStick to change the color of your device.
Of course you are not limited to GMail only! Trigger will work with all IFTTT channels so now you can get really creative! 
Would love to know what kind of notifications you come up with in the comments bellow 
